Installed Microphone Cables
Only high grade microphone cable should be used: (ie: Hartland 2129)
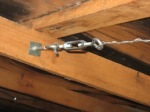
If the cable pathway is via the ceiling cavity, it must be supported by a catenary or similar supporting structure. The microphone cable should be tied to the support with Velcro wraps to avoid distorting the shield. If the cable is to go under the building then it will go through conduit for vermin protection.
Through walls- It is preferred if the microphone cable goes through a cavity that is not shared by other services. If the microphone cable must go through a shared cavity the cable should be run through conduit from the ceiling cavity to the sound desk cabinet. A separation of at least 100- 200 mm is needed from all mains power cables. Avoid parallel runs along with mains cables more than 3 metres to avoid interference.
Installed Plugs and Sockets
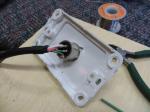
The standard of soldered plugs and sockets should be of the highest standard. Installed plugs and sockets need to be labeled.
Suggested procedure:
• Strip cable outer back without damaging the conductor insulators
• Bare 5 mm of the conductors
• Split the shield into two and the Heat-shrink
• Heat-shrink the cable cover to conductors area
• Solder conductors to terminals
The suggested wiring standard for installed XLR plugs and sockets will be:
| Pin Numbers | Cable | Colours |
| 1 | Shield | Heat-shrink |
| 2 | Hot | Red or Blue |
| 3 | Cold | Black or White |
| Earth tag terminal | Cable restraint (Shield) | Heat-shrink |

